Understand the Scratch grid
Every sprite on the Scratch stage has a position. Scratch describes that position using two numbers, written as (x, y) — for example (50, -100).
- The first number is x. It tells Scratch how far left or right the sprite is.
- The second number is y. It tells Scratch how far up or down the sprite is.
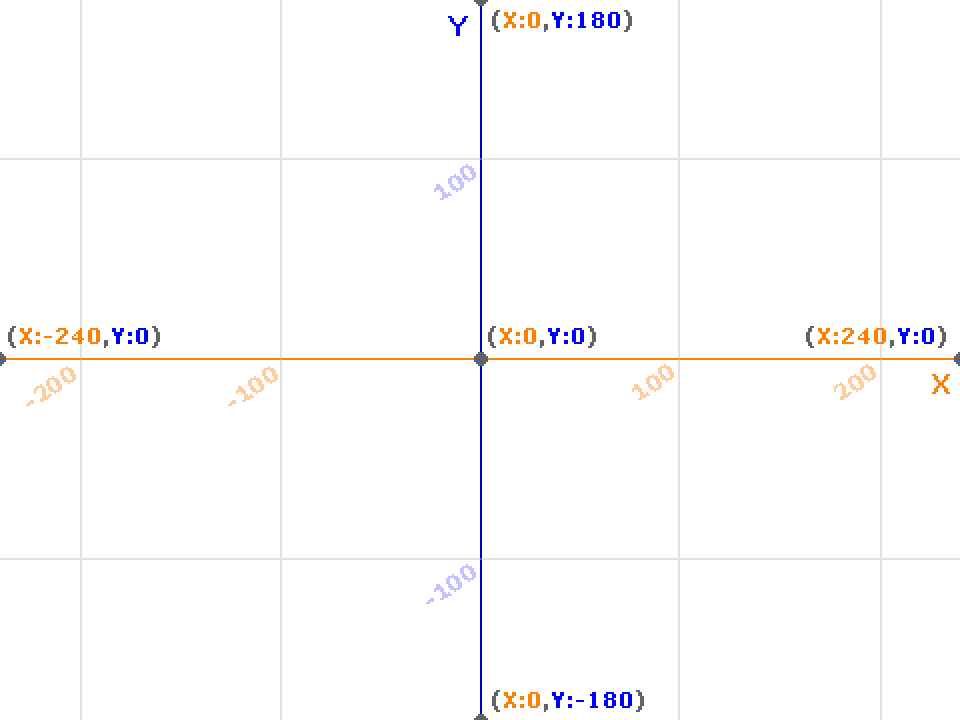
The very middle of the stage is (0, 0).
➡️ ⬅️ Left and right: x
The x number can be anywhere from -240 (the far left) to 240 (the far right).
- Increase x to move a sprite to the right.
- Decrease x to move a sprite to the left.
⬆️ ⬇️ Up and down: y
The y number can be anywhere from -180 (the bottom) to 180 (the top).
- Increase y to move a sprite up.
- Decrease y to move a sprite down.
Here’s the quick version:
| Move a sprite… | Do this |
|---|---|
| Right ➡️ | increase x |
| Left ⬅️ | decrease x |
| Up ⬆️ | increase y |
| Down ⬇️ | decrease y |
🧱 Using x and y in your code
You’ll use x and y whenever you tell a sprite where to go. The go to x: y: block jumps a sprite straight to a position:
go to x: (50) y: (-100)
This puts the sprite a bit to the right of the middle, and below it.
You can also move a sprite a little at a time using change x by and change y by, instead of jumping straight to a position:
change x by (10)
change y by (10)
This nudges the sprite 10 steps to the right, and 10 steps up.