<?xml version="1.0" encoding="utf-8"?><feed xmlns="http://www.w3.org/2005/Atom" ><generator uri="https://jekyllrb.com/" version="4.4.1">Jekyll</generator><link href="https://gravesend-code-club.viboko.dev/feed.xml" rel="self" type="application/atom+xml" /><link href="https://gravesend-code-club.viboko.dev/" rel="alternate" type="text/html" /><updated>2026-09-04T08:31:30+00:00</updated><id>https://gravesend-code-club.viboko.dev/feed.xml</id><title type="html">Gravesend Code Club</title><subtitle>Resources for Gravesend Code Club</subtitle><author><name>Matthew Hasler</name></author><entry><title type="html">July 2026</title><link href="https://gravesend-code-club.viboko.dev/2026/07/11/july-2026-session" rel="alternate" type="text/html" title="July 2026" /><published>2026-07-11T00:00:00+00:00</published><updated>2026-07-11T00:00:00+00:00</updated><id>https://gravesend-code-club.viboko.dev/2026/07/11/july-2026-session</id><content type="html" xml:base="https://gravesend-code-club.viboko.dev/2026/07/11/july-2026-session"><![CDATA[]]></content><author><name>Matthew Hasler</name></author><category term="session" /><summary type="html"><![CDATA[A round-up of the Scratch projects which were demoed at the July 2026 Code Club session.]]></summary></entry><entry><title type="html">Cat &amp;amp; Mouse</title><link href="https://gravesend-code-club.viboko.dev/2026/07/01/cat-and-mouse-project" rel="alternate" type="text/html" title="Cat &amp;amp; Mouse" /><published>2026-07-01T00:00:00+00:00</published><updated>2026-07-01T00:00:00+00:00</updated><id>https://gravesend-code-club.viboko.dev/2026/07/01/cat-and-mouse-project</id><content type="html" xml:base="https://gravesend-code-club.viboko.dev/2026/07/01/cat-and-mouse-project"><![CDATA[<section>

  <p>This project comes from Joe Haig’s <a href="https://jrmhaig.github.io/Code_Club_Resources/scratch" target="_blank" rel="noopener noreferrer">Code Club Resources</a>, reused here with permission.</p>

  <p>Move a cat around the screen with the arrow keys, chase down scampering mice, and dodge flying tennis balls!</p>

  <hr />

</section>
<section>

  <h2 id="step-1-remix-the-starter-project">🔄 Step 1: Remix the Starter Project</h2>

  <p>Open the starter project at <a href="https://scratch.mit.edu/projects/1267587027/editor" target="_blank" rel="noopener noreferrer">scratch.mit.edu/projects/1267587027</a> and click <strong>Remix</strong> to make your own copy. Don’t forget to give it a new name!</p>

  <p>The starter project has four sprites:</p>

  <ul>
    <li>the <strong>cat</strong>, which the player will move with the arrow keys</li>
    <li>the <strong>mouse</strong>, which the cat will try to catch</li>
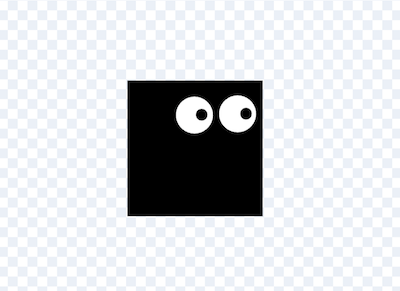
    <li>a <strong>tennis ball</strong>, which will fly around the screen and the cat has to avoid</li>
    <li>a <strong>message</strong> to show that the game is over</li>
  </ul>

  <p>This game will use <strong>clones</strong> so that there will be lots of mice to catch and lots of tennis balls to avoid. Clones let Scratch make lots of copies of the same sprite.</p>

  <hr />

</section>
<section>

  <h2 id="step-2-follow-the-instructions">📖 Step 2: Follow the instructions</h2>

  <p>The rest of the steps are in the worksheet below - work through it one step at a time.</p>

  <p>
    <a href="/assets/pdf/cat-and-mouse-project/CatAndMouse.pdf" class="btn btn--large btn--primary" target="_blank" rel="noopener noreferrer">📄 Open the instructions (PDF)</a>
</p>

  <hr />

</section>
<section>

  <h2 id="challenges">🤔 Challenges</h2>

  <ul>
    <li><em>Can you keep track of how many mice the cat has caught?</em></li>
    <li><em>Can you make the mice move at different speeds?</em></li>
    <li><em>Can you make new mice appear at random instead of every 2 seconds?</em></li>
    <li><em>Can you make the tennis balls disappear when they hit the cat?</em></li>
    <li><em>What else can you think of?</em></li>
  </ul>

  <hr />

</section>
<section>

  <p>Worksheet by Joe Haig, <a href="https://jrmhaig.github.io/Code_Club_Resources/scratch" target="_blank" rel="noopener noreferrer">Code Club Resources</a>, licensed <a href="https://creativecommons.org/licenses/by-nc-sa/4.0/" target="_blank" rel="noopener noreferrer">CC BY-NC-SA 4.0</a>. Used with permission.</p>

</section>]]></content><author><name>Matthew Hasler</name></author><category term="scratch" /><category term="project" /><summary type="html"><![CDATA[Move a cat around the screen, chase down mice, and dodge flying tennis balls using Scratch clones.]]></summary></entry><entry><title type="html">June 2026</title><link href="https://gravesend-code-club.viboko.dev/2026/06/13/june-2026-session" rel="alternate" type="text/html" title="June 2026" /><published>2026-06-13T00:00:00+00:00</published><updated>2026-06-13T00:00:00+00:00</updated><id>https://gravesend-code-club.viboko.dev/2026/06/13/june-2026-session</id><content type="html" xml:base="https://gravesend-code-club.viboko.dev/2026/06/13/june-2026-session"><![CDATA[]]></content><author><name>Matthew Hasler</name></author><category term="session" /><summary type="html"><![CDATA[A round-up of the Scratch projects which were demoed at the June 2026 Code Club session.]]></summary></entry><entry><title type="html">Fireworks</title><link href="https://gravesend-code-club.viboko.dev/2026/06/01/fireworks-project" rel="alternate" type="text/html" title="Fireworks" /><published>2026-06-01T00:00:00+00:00</published><updated>2026-06-01T00:00:00+00:00</updated><id>https://gravesend-code-club.viboko.dev/2026/06/01/fireworks-project</id><content type="html" xml:base="https://gravesend-code-club.viboko.dev/2026/06/01/fireworks-project"><![CDATA[<section>

  <p>These steps are available at <a href="https://bit.ly/fireworks-steps">bit.ly/fireworks-steps</a>.</p>

  <div class="no-print">
    <iframe src="https://scratch.mit.edu/projects/1328023584/embed" allowtransparency="true" width="800" height="663" frameborder="0" scrolling="no" allowfullscreen="" title="Scratch project 1328023584">
    </iframe>
    <p>
        <a href="https://scratch.mit.edu/projects/1328023584" class="btn btn--large btn--scratch">See in Scratch</a>
    </p>
</div>

  <hr />

</section>
<section>

  <h2 id="step-1-remix-the-starter-pack">🔄 Step 1: Remix the Starter Pack</h2>

  <p>Follow the link: <a href="https://bit.ly/fireworks-starter">bit.ly/fireworks-starter</a>.</p>

  <p>Next tap <strong>Remix</strong>. When the project loads, give it a new name. Have a look around the project.</p>

</section>
<section>

  <ul>
    <li><em>What sprites do you have available?</em></li>
    <li><em>What costumes do the sprites have?</em></li>
    <li><em>What sounds do you have available?</em></li>
    <li><em>Is there any code already?</em></li>
  </ul>

  <hr />

</section>
<section>

  <h2 id="step-2-choose-or-draw-a-background">🎨 Step 2: Choose or draw a background</h2>

  <p>Where do you want your fireworks display to take place? Maybe you could draw a background or generate one using AI!</p>

  <hr />

</section>
<section>

  <h2 id="step-3-wait-for-user-to-press-the-mouse">🖱️ Step 3: Wait for user to press the mouse</h2>

  <p>In the rocket sprite check when the mouse button is pressed tell it to launch.</p>

  <p>This will not actually make the rocket appear. Instead it makes a clone (or copy) of the sprite and the next script will launch it.</p>

  <pre><code class="language-scratch">when green flag clicked
hide
switch costume to (rocket v)
forever
    if &lt;mouse down?&gt; then
        create clone of (myself v)
    end
end
</code></pre>

  <hr />

</section>
<section>

  <h2 id="step-4-animate-the-firework">🎆 Step 4: Animate the firework</h2>

  <pre><code class="language-scratch">when I start as a clone
go to x: (0) y: (-180)
point towards (mouse-pointer v)
glide (1) secs to (mouse pointer v)
delete this clone
</code></pre>

  <ul>
    <li><em>Can you make the firework make a noise as it flies upwards?</em></li>
    <li><em>Can you make the firework move slower or faster?</em></li>
    <li><em>Can you make the firework start from a random position along the bottom of the screen?</em></li>
  </ul>

  <hr />

</section>
<section>

  <h2 id="step-5-make-only-one-rocket-appear-at-a-time">🚀 Step 5: Make only one rocket appear at a time</h2>

  <p>Have you noticed that if you hold the mouse button down, you will make lots of fireworks appear at once? If you want to fix this, you can add this right after you create the clone:</p>

  <pre><code class="language-scratch">wait until &lt;not &lt;mouse down?&gt;&gt;
</code></pre>

  <hr />

</section>
<section>

  <h2 id="step-6-make-the-firework-explode">💥 Step 6: Make the firework explode</h2>

  <p>Add this code right before we delete the clone:</p>

  <pre><code class="language-scratch">repeat (3)
    next costume
    wait (0.2) seconds
end
</code></pre>

  <ul>
    <li><em>What is a good sound to play when the firework explodes?</em></li>
    <li><em>Can you make the explosion animation last longer?</em></li>
    <li><em>Can you change the colour of the explosion?</em></li>
  </ul>

  <hr />

</section>
<section>

  <h2 id="challenges">🤔 Challenges</h2>

  <ul>
    <li><em>Can you add different types of fireworks?</em></li>
    <li><em>Can you add fireworks that spin around?</em></li>
  </ul>

</section>]]></content><author><name>Matthew Hasler</name></author><category term="scratch" /><category term="project" /><summary type="html"><![CDATA[Build a fireworks display in Scratch using colourful particle effects that launch and explode on the stage.]]></summary></entry><entry><title type="html">Platformer</title><link href="https://gravesend-code-club.viboko.dev/2026/05/01/platformer-project" rel="alternate" type="text/html" title="Platformer" /><published>2026-05-01T00:00:00+00:00</published><updated>2026-05-01T00:00:00+00:00</updated><id>https://gravesend-code-club.viboko.dev/2026/05/01/platformer-project</id><content type="html" xml:base="https://gravesend-code-club.viboko.dev/2026/05/01/platformer-project"><![CDATA[<section>

  <p>These steps are available at <a href="https://shorturl.at/W1Ohk">shorturl.at/W1Ohk</a>.</p>

  <div class="no-print">
    <iframe src="https://scratch.mit.edu/projects/1316430329/embed" allowtransparency="true" width="800" height="663" frameborder="0" scrolling="no" allowfullscreen="" title="Scratch project 1316430329">
    </iframe>
    <p>
        <a href="https://scratch.mit.edu/projects/1316430329" class="btn btn--large btn--scratch">See in Scratch</a>
    </p>
</div>

  <hr />

</section>
<section>

  <h2 id="step-1-remix-the-starter-project">🔄 Step 1: Remix the starter project</h2>

  <p>Open the starter project at <a href="https://shorturl.at/LM268">shorturl.at/LM268</a> and click <em>Remix</em> to make your own copy.</p>

  <p>The starter project comes with a background image and a sprite which is a knight character. You could use the knight as the character in your game or add a different sprite.</p>

  <hr />

</section>
<section>

  <h2 id="step-2-add-a-variable-called-jump-speed">🎚️ Step 2: Add a variable called <em>jump speed</em></h2>

  <p>Click <em>Make a Variable</em> and call it <em>jump speed</em>. Untick the variable so that it doesn’t appear on the screen.</p>

  <p>Now set the <em>jump speed</em> to <strong>0</strong> when the game starts.</p>

  <pre><code class="language-scratch">when green flag clicked
set [jump speed v] to (0)
</code></pre>

  <hr />

</section>
<section>

  <h2 id="step-3-make-the-character-fall-to-the-bottom-of-the-screen-with-gravity">⬇️ Step 3: Make the character fall to the bottom of the screen with gravity</h2>

  <p>You will create a <em>repeat until</em> loop which ends when the character reaches the door at the top-right of the screen.</p>

  <pre><code class="language-scratch">when green flag clicked
set [jump speed v] to (0)
go to x: (0) y: (-100)
repeat until &lt;touching color (#78cdee)?&gt;
    change y by (jump speed)
    change [jump speed v] by (-1)
end
</code></pre>

  <ul>
    <li><em>How can you make gravity lower, like on the moon? Or higher, like on Jupiter?</em></li>
  </ul>

  <hr />

</section>
<section>

  <h2 id="step-4-make-the-character-stop-falling-when-they-hit-the-ground">🛑 Step 4: Make the character stop falling when they hit the ground</h2>

  <p>You might have noticed that the character just keeps falling through the floor.</p>

  <p>Inside the <em>repeat until</em> loop, add this code to make them stop when they get to the floor.</p>

  <pre><code class="language-scratch">if &lt;&lt;touching color (#000000)?&gt; and &lt;(jump speed) &lt; (0)&gt;&gt; then
    repeat until &lt;not &lt;touching color (#000000)?&gt;&gt;
        change y by (1)
    end
    set [jump speed v] to (0)
end
</code></pre>

  <hr />

</section>
<section>

  <h2 id="step-5-add-a-block-to-fix-the-weird-animation">🎬 Step 5: Add a block to fix the weird animation!</h2>

  <p>Now the character doesn’t fall through the floor, but they gradually float up which looks a bit weird! To fix this, we put this code inside a custom block called <em>put on ground</em>.</p>

  <p>⚠️ <strong>Very important</strong>: make sure you select <em>Run without screen refresh</em> when you create the custom block. This will mean that the character moves straight up without the weird animation.</p>

  <pre><code class="language-scratch">define put on ground
repeat until &lt;not &lt;touching color (#000000)?&gt;&gt;
    change y by (1)
end
set [jump speed v] to (0)

if &lt;&lt;touching color (#000000)?&gt; and &lt;(jump speed) &lt; (0)&gt;&gt; then
    put on ground
end
</code></pre>

  <p><strong>Note</strong>: The colour you use here will be the colour of the platforms you add in Step 10. It is important that you don’t use a colour which is already in the background image. Black should work well.</p>

  <hr />

</section>
<section>

  <h2 id="step-6-add-a-variable-called-on-ground">🎚️ Step 6: Add a variable called <em>on ground?</em></h2>

  <p>We are going to add a variable called <em>on ground?</em>. This is going to be set to <strong>1</strong> if the character is on the ground or <strong>0</strong> if the character is jumping or falling. Remember to untick the variable so that it doesn’t appear on the screen.</p>

  <p>After you set the <em>jump speed</em> at the start of the script, you also need to set <em>on ground?</em> like this:</p>

  <pre><code class="language-scratch">set [on ground? v] to (0)
</code></pre>

  <p>And we need to update our custom block to set <em>on ground?</em> to <strong>1</strong>, like this:</p>

  <pre><code class="language-scratch">define put on ground
repeat until &lt;not &lt;touching color (#000000)?&gt;&gt;
    change y by (1)
end
set [jump speed v] to (0)
set [on ground? v] to (1)
</code></pre>

  <hr />

</section>
<section>

  <h2 id="step-7-make-the-character-jump">🦘 Step 7: Make the character jump</h2>

  <p>To make the character jump, we need to add this code inside the <em>repeat until</em> loop:</p>

  <pre><code class="language-scratch">if &lt;&lt;key (up arrow v) pressed?&gt; and &lt;(on ground?) = (1)&gt;&gt; then
    set [on ground? v] to (0)
    set [jump speed v] to (12)
end
</code></pre>

  <p>This means that the character will only jump if it is on the ground. Try pressing the <em>up arrow</em> to see the character jumping.</p>

  <ul>
    <li><em>Can you make the character jump higher or lower?</em></li>
    <li><em>Can you play a sound effect when the character jumps?</em></li>
  </ul>

  <hr />

</section>
<section>

  <h2 id="step-8-add-a-variable-called-run-speed">🎚️ Step 8: Add a variable called <em>run speed</em></h2>

  <p>We also want the character to run left and right. To do this, we first need a new variable called <em>run speed</em>. As before, untick the variable so that it doesn’t show on the screen.</p>

  <p>We want to set <em>run speed</em> to <strong>0</strong> when the game starts:</p>

  <pre><code class="language-scratch">set [run speed v] to (0)
</code></pre>

  <hr />

</section>
<section>

  <h2 id="step-9-make-the-character-run-left-and-right">🏃 Step 9: Make the character run left and right</h2>

  <p>Now add this code inside the <em>repeat until</em> loop:</p>

  <pre><code class="language-scratch">if &lt;key (left arrow v) pressed?&gt; then
    change [run speed v] by (-2)
end
if &lt;key (right arrow v) pressed?&gt; then
    change [run speed v] by (2)
end
</code></pre>

  <p>And we need to add an extra line right at the top of the <em>repeat until</em> loop so that the character runs according to the <em>run speed</em>:</p>

  <pre><code class="language-scratch">change x by (run speed)
</code></pre>

  <ul>
    <li><em>Can you make the character look to the left or right when they are running?</em></li>
  </ul>

  <hr />

</section>
<section>

  <h2 id="step-10-make-the-character-slow-down">🐌 Step 10: Make the character slow down</h2>

  <p>Right now, the character slides left and right like they are on an ice rink! We need to add some friction to slow the character down.</p>

  <p>Add this code right at the end of the <em>repeat until</em> loop:</p>

  <pre><code class="language-scratch">set [run speed v] to ((run speed) * (0.7))
</code></pre>

  <ul>
    <li><em>How can you make the friction stronger and weaker?</em></li>
  </ul>

  <hr />

</section>
<section>

  <h2 id="step-11-add-some-platforms">🧱 Step 11: Add some platforms</h2>

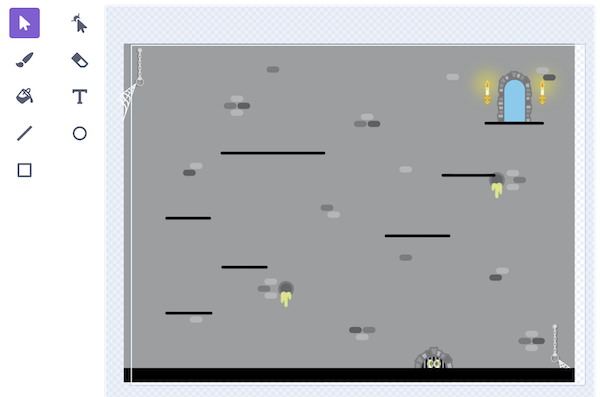
  <p>Finally, we need to add some platforms to the backdrop so that the character can reach the door to complete the game. You can add them anywhere you want, but they must match the colour you used in the <em>touching color</em> check.</p>

  <p><img src="/assets/img/platformer-project/step-10-01.webp" alt="Step 10 - add platforms" /></p>

  <hr />

</section>
<section>

  <h2 id="challenges">🤔 Challenges</h2>

  <ul>
    <li><em>Can you add more levels to the game?</em></li>
    <li><em>Can you add some obstacles that make you go back to the start of the level?</em></li>
  </ul>

</section>]]></content><author><name>Matthew Hasler</name></author><category term="scratch" /><category term="project" /><summary type="html"><![CDATA[Build a platformer game in Scratch starring a knight, with jumping, gravity and level obstacles.]]></summary></entry><entry><title type="html">Snake</title><link href="https://gravesend-code-club.viboko.dev/2026/03/01/snake-project" rel="alternate" type="text/html" title="Snake" /><published>2026-03-01T00:00:00+00:00</published><updated>2026-03-01T00:00:00+00:00</updated><id>https://gravesend-code-club.viboko.dev/2026/03/01/snake-project</id><content type="html" xml:base="https://gravesend-code-club.viboko.dev/2026/03/01/snake-project"><![CDATA[<p>These steps are available at <a href="https://bit.ly/snake-steps">bit.ly/snake-steps</a>.</p>

<div class="no-print">
    <iframe src="https://scratch.mit.edu/projects/1289527161/embed" allowtransparency="true" width="800" height="663" frameborder="0" scrolling="no" allowfullscreen="" title="Scratch project 1289527161">
    </iframe>
    <p>
        <a href="https://scratch.mit.edu/projects/1289527161" class="btn btn--large btn--scratch">See in Scratch</a>
    </p>
</div>

<section>

  <hr />

  <h2 id="step-1-draw-a-snake-head-sprite">🐍 Step 1: Draw a snake head sprite</h2>

  <p>Create a new sprite called “head” and have the snake head pointing to the right.</p>

  <p><img src="/assets/img/snake-project/step-01-01.webp" alt="Step 1 - Draw head" /></p>

</section>
<section>

  <h2 id="step-2-start-the-snake-moving">➡️ Step 2: Start the snake moving</h2>

  <pre><code class="language-scratch">when green flag clicked
go to x: [0] y: [0]
point in direction [90]
forever
    move [5] steps
end
</code></pre>

</section>
<section>

  <ul>
    <li><em>Can you make the snake move faster or slower?</em></li>
    <li><em>Can you make the snake start moving in a different direction?</em></li>
    <li><em>Can you start the snake from the corner of the screen?</em></li>
  </ul>

  <hr />

</section>
<section>

  <h2 id="step-3-add-controls-to-change-the-direction-of-the-snake">🕹️ Step 3: Add controls to change the direction of the snake</h2>

  <p>This code should go at the end of your <strong>forever</strong> loop:</p>

  <pre><code class="language-scratch">if &lt;key (left arrow v) pressed?&gt; then
    point in direction [-90]
end
if &lt;key (right arrow v) pressed?&gt; then
    point in direction [90]
end
if &lt;key (up arrow v) pressed?&gt; then
    point in direction [0]
end
if &lt;key (down arrow v) pressed?&gt; then
    point in direction [180]
end
</code></pre>

</section>
<section>

  <ul>
    <li><em>Can you make it so the snake can’t turn to the left if it is facing right?</em></li>
    <li><em>Can you add the same behaviour for the other three directions?</em></li>
  </ul>

  <hr />

</section>
<section>

  <h2 id="step-4-draw-a-snake-body-sprite">🎨 Step 4: Draw a snake body sprite</h2>

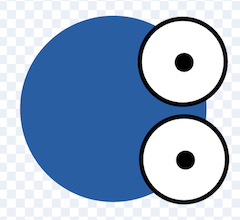
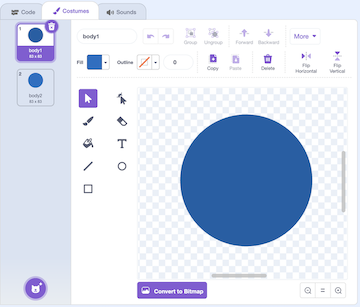
  <p>Create a new sprite and draw a snake body. Then add another costume and draw another snake body with a different colour (VERY IMPORTANT!)</p>

  <p><img src="/assets/img/snake-project/step-04-01.webp" alt="Step 1 - Draw body" /></p>

  <p>We need two different colours for the body so that we can make the hit detection work later on! The colours don’t have to be completely different - two similar shades is fine.</p>

  <hr />

</section>
<section>

  <h2 id="step-5-add-a-new-variable-called-snake-length">📏 Step 5: Add a new variable called “snake length”</h2>

  <p>First add a variable called “snake length”. Next, add this code to the snake body sprite:</p>

  <pre><code class="language-scratch">when green flag clicked
set [snake length v] to (0.2)
hide
</code></pre>

  <hr />

</section>
<section>

  <h2 id="step-6-clone-the-snake-body">👥 Step 6: Clone the snake body</h2>

  <p>Back in the snake head sprite, add this block at the end of your <strong>forever</strong> loop.</p>

  <pre><code class="language-scratch">create clone of (snake body v)
</code></pre>

  <hr />

</section>
<section>

  <h2 id="step-7-make-the-snake-body-move">〰️ Step 7: Make the snake body move</h2>

  <p>Now inside the snake body sprite, add this code to show the first costume then the second costume:</p>

  <pre><code class="language-scratch">when I start as a clone
go to (snake head v)
go to [back v] layer
switch costume to (body1 v)
show
wait (0.2) seconds
switch costume to (body2 v)
wait (snake length) seconds
delete this clone
</code></pre>

  <p>When you test the game now, you should see a 2-colour snake body following the head.</p>

  <hr />

</section>
<section>

  <h2 id="step-8-draw-some-food-for-the-snake">🍎 Step 8: Draw some food for the snake</h2>

  <p>Next we want to add some food for the snake to eat. You could draw some food or choose one of the existing sprites.</p>

  <p><img src="/assets/img/snake-project/step-08-01.webp" alt="Step 1 - Draw food" /></p>

  <hr />

</section>
<section>

  <h2 id="step-9-setup-the-food-sprite">⚙️ Step 9: Setup the food sprite</h2>

  <p>You should create a variable called “food” and add this code to the food sprite:</p>

  <pre><code class="language-scratch">when green flag clicked
set [food v] to (0)
hide
create clone of (myself v)
</code></pre>

  <p>This will hide the food, then create a clone of it (which will also start as hidden).</p>

  <hr />

</section>
<section>

  <h2 id="step-10-let-the-snake-eat-the-food">😋 Step 10: Let the snake eat the food</h2>

  <p>Also in the food sprite, add this code:</p>

  <pre><code class="language-scratch">when I start as a clone
go to (random position v)
show
repeat until &lt;&lt;touching (snake head v)?&gt; or &lt;touching (snake body v)?&gt;&gt;
end
change [snake length v] by (0.1)
change [food v] by (1)
create clone of (myself v)
delete this clone
</code></pre>

  <p>This will put the food in a random position, and when the snake eats the food, it will:</p>

  <ul>
    <li>make the snake longer,</li>
    <li>add 1 to the food variable,</li>
    <li>create a new piece of food</li>
    <li>and delete the food that has just been eaten</li>
  </ul>

  <hr />

</section>
<section>

  <h2 id="step-11-end-the-game-if-the-player-loses">💀 Step 11: End the game if the player loses</h2>

  <p>Lastly, we want the game to end if the snake touches the edge of the screen, or if it touches its own body. This is where the 2 colour body comes in handy!</p>

  <p>Back in the snake head sprite, add this to the end of the <strong>forever</strong> loop:</p>

  <pre><code class="language-scratch">if &lt;&lt;touching (edge)&gt; or &lt;touching color (#086fc5)?&gt;&gt; then
    stop [this script v]
end
</code></pre>

  <p>The colour that you select in the touching color check should be the colour of the second snake body costume.</p>

  <hr />

</section>
<section>

  <h2 id="challenges">🤔 Challenges</h2>

  <ul>
    <li><em>Can you add sound effects when the snake eats the food, or when the snake dies?</em></li>
    <li><em>Can you add some different food?</em></li>
    <li><em>Can you make some food make the snake go faster or slower?</em></li>
    <li><em>Can you keep track of the high score?</em></li>
    <li><em>Can you add a Game Over screen?</em></li>
  </ul>

</section>]]></content><author><name>Matthew Hasler</name></author><category term="scratch" /><category term="project" /><summary type="html"><![CDATA[Build a classic Snake game in Scratch, growing your snake as it eats and avoiding hitting itself.]]></summary></entry><entry><title type="html">Square Dash</title><link href="https://gravesend-code-club.viboko.dev/2026/02/01/square-dash-project" rel="alternate" type="text/html" title="Square Dash" /><published>2026-02-01T00:00:00+00:00</published><updated>2026-02-01T00:00:00+00:00</updated><id>https://gravesend-code-club.viboko.dev/2026/02/01/square-dash-project</id><content type="html" xml:base="https://gravesend-code-club.viboko.dev/2026/02/01/square-dash-project"><![CDATA[<section>

  <p>These steps are available at <a href="https://bit.ly/square-dash-steps">bit.ly/square-dash-steps</a>.</p>

  <div class="no-print">
    <iframe src="https://scratch.mit.edu/projects/1264077576/embed" allowtransparency="true" width="800" height="663" frameborder="0" scrolling="no" allowfullscreen="" title="Scratch project 1264077576">
    </iframe>
    <p>
        <a href="https://scratch.mit.edu/projects/1264077576" class="btn btn--large btn--scratch">See in Scratch</a>
    </p>
</div>

  <hr />

</section>
<section>

  <h2 id="step-1-draw-the-background">🎨 Step 1: Draw the background</h2>

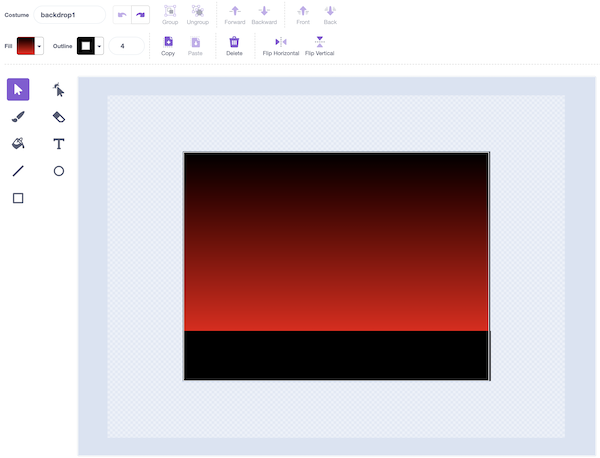
  <p>Start with an empty Scratch project. Draw the background however you want, but include a floor at the bottom for your player to stand on.</p>

  <p><img src="/assets/img/square-dash-project/step-01-01.webp" alt="Step 1 - Draw background" /></p>

  <hr />

</section>
<section>

  <h2 id="step-2-draw-the-player-sprite">🧑 Step 2: Draw the player sprite</h2>

  <p>Design your player however you like.</p>

  <p><img src="/assets/img/square-dash-project/step-02-01.webp" alt="Step 2 - Draw player" /></p>

  <hr />

</section>
<section>

  <h2 id="step-3-position-the-player-on-the-ground">📍 Step 3: Position the player on the ground</h2>

  <pre><code class="language-scratch">when green flag clicked
go to x: [-150] y: [-75]
</code></pre>

  <hr />

</section>
<section>

  <h2 id="step-4-make-the-player-jump">🦘 Step 4: Make the player jump</h2>

  <p>Add a forever loop</p>

  <pre><code class="language-scratch">when green flag clicked
go to x: [-150] y: [-75]
forever
    if &lt;key (space v) pressed?&gt; then
        repeat (12)
            change y by (10)
        end
        repeat (12)
            change y by (-10)
        end
    end
end
</code></pre>

  <ul>
    <li><em>Can you change the height that the player jumps?</em></li>
    <li><em>Can you make the player jump slower or faster?</em></li>
    <li><em>Can you make the player do a backflip when they jump?</em></li>
    <li><em>Can you make the player jump more smoothly?</em> <strong>TRICKY</strong> 🤔</li>
  </ul>

  <hr />

</section>
<section>

  <h2 id="step-5-draw-an-obstacle-sprite">🚧 Step 5: Draw an obstacle sprite</h2>

  <p>Draw something for the player to jump over.</p>

  <p><img src="/assets/img/square-dash-project/step-05-01.webp" alt="Step 5 - Draw obstacle" /></p>

  <hr />

</section>
<section>

  <h2 id="step-6-create-a-clone">👥 Step 6: Create a clone</h2>

  <p>Rather than move the obstacle sprite itself, we are going to create a clone. That will allow us to have more than one obstacle on the screen at the same time. Inside the obstacle sprite add this code:</p>

  <pre><code class="language-scratch">when green flag clicked
hide
forever
    create clone of (myself v)
    wait (2) seconds
end
</code></pre>

  <p>And also add this block which uses a <strong>repeat until</strong> to move the sprite from right-to-left across the screen. You will want to adjust the coordinates to work for your sprites and background image.</p>

  <pre><code class="language-scratch">when I start as a clone
go to x: (240) y: (-100)
show
repeat until &lt;(x position) &lt; (-240)&gt;
    change x by (-10)
end
hide
</code></pre>

  <ul>
    <li><em>Can you make the obstacle move faster or slower across the screen?</em></li>
    <li><em>Can you make the obstacles appear more regularly?</em></li>
    <li><em>Can you make the obstacles appear at random times?</em></li>
    <li><em>Can you make the size of obstacles be random?</em></li>
    <li><em>Can you add different types of obstacles?</em></li>
    <li><em>Can you add a floating obstacle?</em></li>
    <li><em>Can you make the obstacles spin or move up and down?</em></li>
  </ul>

  <hr />

</section>
<section>

  <h2 id="step-7-end-the-game-when-the-player-hits-the-obstacle">💥 Step 7: End the game when the player hits the obstacle</h2>

  <p>Inside the <strong>repeat until</strong> we are going to add a check to see if the obstacle is touching the player. If it is, we will broadcast a <strong>game over</strong> message.</p>

  <pre><code class="language-scratch">when I start as a clone
go to x: (240) y: (-100)
show
repeat until &lt;(x position) &lt; (-240)&gt;
    change x by (-10)
    if &lt;touching (player v)?&gt; then
        broadcast (game over v)
    end
end
hide
</code></pre>

  <hr />

</section>
<section>

  <h2 id="step-8-create-a-game-over-sprite">💀 Step 8: Create a game over sprite</h2>

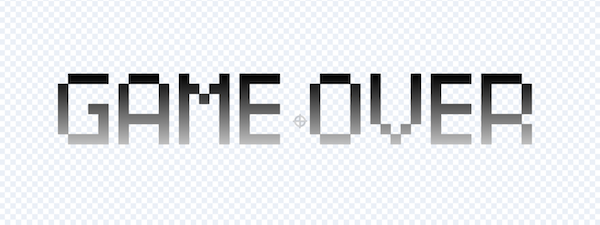
  <p>Create a new sprite which will be displayed when the game is over. You could use the Text tool to write the words “game over”.</p>

  <p><img src="/assets/img/square-dash-project/step-08-01.webp" alt="Step 8 - Draw game over" /></p>

  <hr />

</section>
<section>

  <h2 id="step-9-display-the-game-over-sprite">📢 Step 9: Display the game over sprite</h2>

  <p>When the game starts, you should position the game over sprite in the right position and hide it.</p>

  <pre><code class="language-scratch">when green flag clicked
go to x: (0) y: (36)
hide
</code></pre>

  <p>So far, nothing happens after we broadcast the <strong>game over</strong> message. We are going to receive it inside the game over sprite:</p>

  <pre><code class="language-scratch">when I receive [game over v]
show
stop [all v]
</code></pre>

  <hr />

</section>
<section>

  <h2 id="step-10-count-the-distance-travelled">📏 Step 10: Count the distance travelled</h2>

  <p>Create a variable called <strong>distance</strong> and make sure it is ticked so it appears on the screen.</p>

  <p><img src="/assets/img/square-dash-project/step-10-01.webp" alt="Step 10 - distance variable" /></p>

  <p>Add this new code block to the player sprite.</p>

  <pre><code class="language-scratch">when green flag clicked
forever
wait (0.1) seconds
change [distance v] by (1)
end
</code></pre>

  <ul>
    <li><em>How do you set the distance back to zero when the game starts?</em></li>
    <li><em>How do you make the distance go up more quickly or slowly?</em></li>
    <li><em>How do you store the furthest distance you have reached?</em></li>
  </ul>

  <hr />

</section>
<section>

  <h2 id="challenges">🤔 Challenges</h2>

  <ul>
    <li><em>Can you change the background colour as you progress?</em></li>
    <li><em>Can you add levels and make the game get faster with each level?</em></li>
    <li><em>Can you add sound effects when you jump or when you hit an obstacle?</em></li>
    <li><em>Can you add background music?</em></li>
    <li><em>Can you add lives so that you don’t lose the first time you hit an obstacle?</em></li>
    <li><em>Can you add different player avatars?</em></li>
    <li><em>Can you animate the player? For example, can make the eyes blink?</em></li>
  </ul>

</section>]]></content><author><name>Matthew Hasler</name></author><category term="scratch" /><category term="project" /><summary type="html"><![CDATA[Build a simple platform-jumping game in Scratch where a square dashes and jumps around the screen.]]></summary></entry><entry><title type="html">Cross the Road</title><link href="https://gravesend-code-club.viboko.dev/2026/01/02/cross-the-road-project" rel="alternate" type="text/html" title="Cross the Road" /><published>2026-01-02T00:00:00+00:00</published><updated>2026-01-02T00:00:00+00:00</updated><id>https://gravesend-code-club.viboko.dev/2026/01/02/cross-the-road-project</id><content type="html" xml:base="https://gravesend-code-club.viboko.dev/2026/01/02/cross-the-road-project"><![CDATA[<p>These steps are available at <a href="https://bit.ly/cross-the-road-steps">bit.ly/cross-the-road-steps</a>.</p>

<section>

  <hr />

  <h2 id="step-1-remix-the-starter-pack">🔄 Step 1: Remix the Starter Pack</h2>

  <p>Follow the link: <a href="https://bit.ly/cross-the-road">bit.ly/cross-the-road-starter</a>.</p>

  <p>Next tap <strong>Remix</strong>. When the project loads, give it a new name. Have a look around the project.</p>

</section>
<section>

  <ul>
    <li><em>What sprites do you have available?</em></li>
    <li><em>What costumes do the sprites have?</em></li>
    <li><em>What sounds are available?</em></li>
    <li><em>What backgrounds do you have?</em></li>
    <li><em>Is there any code already?</em></li>
  </ul>

  <hr />

</section>
<section>

  <h2 id="step-2-position-the-player-at-the-bottom-of-the-screen">🐔 Step 2: Position the player at the bottom of the screen</h2>

  <p>When the game starts, we want to position the player at the bottom of the screen, in the middle. Add this code to the player sprite.</p>

  <pre><code class="language-scratch">when green flag clicked
go to x: [0] y: [-160]
</code></pre>

</section>
<section>

  <ul>
    <li><em>Can you position the player at the top of the screen instead?</em></li>
  </ul>

  <hr />

</section>
<section>

  <h2 id="step-3-make-the-player-walk-to-the-right">🚶‍➡️ Step 3: Make the player walk to the right</h2>

  <p>Add a forever loop and inside check to see if the right arrow is being pressed. If it is, move the player to the right.</p>

  <pre><code class="language-scratch">when green flag clicked
go to x: [0] y: [-160]
forever
    if &lt;key (right arrow v) pressed?&gt; then
        change x by [5]
    end
end
</code></pre>

</section>
<section>

  <ul>
    <li><em>Can you make the player move faster or slower?</em></li>
  </ul>

  <hr />

</section>
<section>

  <h2 id="step-4-make-the-player-walk-in-the-other-directions">⬅️ ⬆️ ⬇️ Step 4: Make the player walk in the other directions</h2>

  <p>Now the player can walk right. Next let’s make them walk left, up and down.</p>

</section>
<section>

  <ul>
    <li><em>When the player moves left, can you make them look to the left?</em></li>
  </ul>

  <hr />

</section>
<section>

  <h2 id="step-5-add-a-car">🚗 Step 5: Add a car</h2>

  <p>Instead of using the car sprite directly, we will clone it. That will let us have more than one car on the screen at the same time.</p>

  <p>To do that, hide the sprite, then clone it and then when the clone is created, position it and show it. We’re going to put it on the left of the screen. Add this code to the car sprite.</p>

  <pre><code class="language-scratch">when green flag clicked
hide
create clone of (myself v)

when I start as a clone
go to x: [-240] y: [-110]
show
</code></pre>

</section>
<section>

  <ul>
    <li><em>Can you pick a different car image?</em></li>
    <li><em>Can you pick a random car image?</em></li>
  </ul>

  <hr />

</section>
<section>

  <h2 id="step-6-make-the-car-move">🚙 Step 6: Make the car move</h2>

  <p>Next we will make the car move from left to right across the screen. We will use repeat until for this. Once it gets across the screen, we can hide the clone.</p>

  <pre><code class="language-scratch">when I start as a clone
go to x: [-240] y: [-110]
show
repeat until &lt;(x position) &gt; (240)&gt;
	change x by (5)
end
hide
</code></pre>

</section>
<section>

  <ul>
    <li><em>Can you make the car move faster or slower?</em></li>
    <li><em>Can you make the car move at a random speed?</em></li>
    <li><em>Can you make the car move in a different lane of the road?</em></li>
    <li><em>Can you make the car move in a random lane of the road?</em> <strong>TRICKY</strong> 🤔</li>
    <li><em>Can you make the car move from right to left?</em></li>
  </ul>

  <hr />

</section>
<section>

  <h2 id="step-7-add-more-cars">🚗 🚙 🚌 Step 7: Add more cars</h2>

  <p>Instead of just creating one clone, add a forever loop and create a clone every 2 seconds.</p>

  <pre><code class="language-scratch">when green flag clicked
hide
forever
	create clone of (myself v)
	wait (2) seconds
end
</code></pre>

</section>
<section>

  <ul>
    <li><em>Can you create clones more often or less often?</em></li>
  </ul>

  <hr />

</section>
<section>

  <h2 id="step-8-make-the-car-squash-the-player">❗️ Step 8: Make the car squash the player</h2>

  <p>Right now, the cars will just keep driving even if the player is in the way. When the car touches the player, broadcast the message “game over”.</p>

  <pre><code class="language-scratch">when I start as a clone
go to x: [-240] y: [-110]
show
repeat until &lt;(x position) &gt; (240)&gt;
	change x by (5)
	if &lt;touching (player v) ?&gt; then
		broadcast (game over v)
	end
end
hide
</code></pre>

  <p>And in the player sprite, when you receive the message, switch the costume and stop the game.</p>

  <pre><code class="language-scratch">when I receive [game over v]
switch costume to (chicken-flat v)
stop [all v]
</code></pre>

</section>
<section>

  <ul>
    <li><em>When you start the game again, how do you unsquash the player?</em></li>
    <li><em>Can you play a sound when the player gets hit?</em></li>
    <li><em>Can you display the game over sprite when the player gets hit?</em></li>
    <li><em>Can you make the player not get hit in each of these two situations?</em> <strong>TRICKY</strong> 🤔</li>
  </ul>

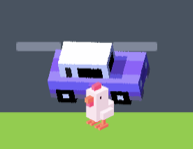
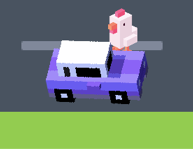
  <p><img src="/assets/img/cross-the-road-project/step-08-01.webp" alt="Step 8 - Hit area 1" />
<img src="/assets/img/cross-the-road-project/step-08-02.webp" alt="Step 8 - Hit area 2" /></p>

  <hr />

</section>
<section>

  <h2 id="step-9-add-some-coins">💰 Step 9: Add some coins</h2>

  <p>Go to the coin sprite and add this code to create 10 clones at random positions.</p>

  <pre><code class="language-scratch">when green flag clicked
hide
repeat (10)
	create clone of (myself v)
end

when I start as a clone
go to (random position v)
show
</code></pre>

</section>
<section>

  <ul>
    <li><em>Can you create more than 10 coins?</em></li>
  </ul>

  <hr />

</section>
<section>

  <h2 id="step-10-let-the-player-collect-the-coins">🤑 Step 10: Let the player collect the coins</h2>

  <pre><code class="language-scratch">when I start as a clone
go to (random position v)
show
forever
    if &lt;touching (player v)?&gt; then
        hide
    end
end
</code></pre>

</section>
<section>

  <ul>
    <li><em>Can you play a sound when the player collects a coin?</em></li>
    <li><em>Can you add a variable to count how many coins you have collected?</em></li>
  </ul>

  <hr />

</section>
<section>

  <h2 id="step-11-finish-the-game-when-the-player-reaches-the-top-of-the-screen">🎉 Step 11: Finish the game when the player reaches the top of the screen</h2>

  <p>Add this code to the forever loop in the player sprite.</p>

  <pre><code class="language-scratch">if &lt;(y position) &gt; (160)&gt; then
    broadcast (you win v)
end
</code></pre>

  <p>And add this inside the you-win sprite.</p>

  <pre><code class="language-scratch">when green flag clicked
hide

when I receive [you win v]
show
stop [all v]
</code></pre>

</section>
<section>

  <ul>
    <li><em>Can you play a sound when the player wins?</em></li>
    <li><em>Can you make it so you only win if you have collected all the coins?</em></li>
  </ul>

  <hr />

</section>
<section>

  <h2 id="challenges">🤔 Challenges</h2>

  <ul>
    <li><em>Can you draw more sprites and use them in your game?</em></li>
    <li><em>Can you add more levels?</em></li>
    <li><em>Can you give the player more than one life?</em></li>
    <li><em>Can you add a screen to choose your character?</em></li>
    <li><em>Can you use the train sprite? How can you draw a train track?</em></li>
  </ul>

</section>]]></content><author><name>Matthew Hasler</name></author><category term="scratch" /><category term="project" /><summary type="html"><![CDATA[Build a Frogger-style game in Scratch, dodging traffic and hopping between lanes to reach safety.]]></summary></entry><entry><title type="html">Join the WiFi</title><link href="https://gravesend-code-club.viboko.dev/2026/01/01/gravesend-library-wifi" rel="alternate" type="text/html" title="Join the WiFi" /><published>2026-01-01T00:00:00+00:00</published><updated>2026-01-01T00:00:00+00:00</updated><id>https://gravesend-code-club.viboko.dev/2026/01/01/gravesend-library-wifi</id><content type="html" xml:base="https://gravesend-code-club.viboko.dev/2026/01/01/gravesend-library-wifi"><![CDATA[<p>To get online during Code Club, connect using one of the three options below.</p>

<div class="option-list">
  <div class="option-list__item">
    <h3 id="use-your-own-library-card-">Use your own library card 📚</h3>

    <p>Connect to <strong>Adult Public Library Wi-Fi</strong>. Your username is the number on the back of your library card, and your password is your PIN — the same one you use to log in to <a href="https://kent.spydus.co.uk/cgi-bin/spydus.exe/MSGTRN/OPAC/LOGINB">Kent Libraries</a>.</p>
  </div>

  <div class="option-list__item">
    <h3 id="borrow-a-code-club-card-">Borrow a Code Club card 🪪</h3>

    <p>No library card, or don’t know your PIN? Connect to <strong>Adult Public Library Wi-Fi</strong> using one of the dummy Code Club cards below instead. If one doesn’t work, just try the next.</p>

    <table class="card-table">
      <thead>
        <tr>
          <th>Card number</th>
          <th>PIN</th>
        </tr>
      </thead>
      <tbody>
        <tr>
          <td>05500010467</td>
          <td>000000</td>
        </tr>
        <tr>
          <td>05500010468</td>
          <td>000000</td>
        </tr>
        <tr>
          <td>05500010469</td>
          <td>000000</td>
        </tr>
        <tr>
          <td>05500010470</td>
          <td>000000</td>
        </tr>
        <tr>
          <td>05500010471</td>
          <td>000000</td>
        </tr>
        <tr>
          <td>05500010472</td>
          <td>000000</td>
        </tr>
        <tr>
          <td>05500010473</td>
          <td>000000</td>
        </tr>
        <tr>
          <td>05500010476</td>
          <td>000000</td>
        </tr>
        <tr>
          <td>05500033348</td>
          <td>000000</td>
        </tr>
      </tbody>
    </table>
  </div>

  <div class="option-list__item">
    <h3 id="use-a-phone-hotspot-">Use a phone hotspot 📱</h3>

    <p>If you have a mobile device with you, turn on its Personal Hotspot and connect to that instead. This is sometimes the best option, since the library Wi-Fi can be slow.</p>
  </div>
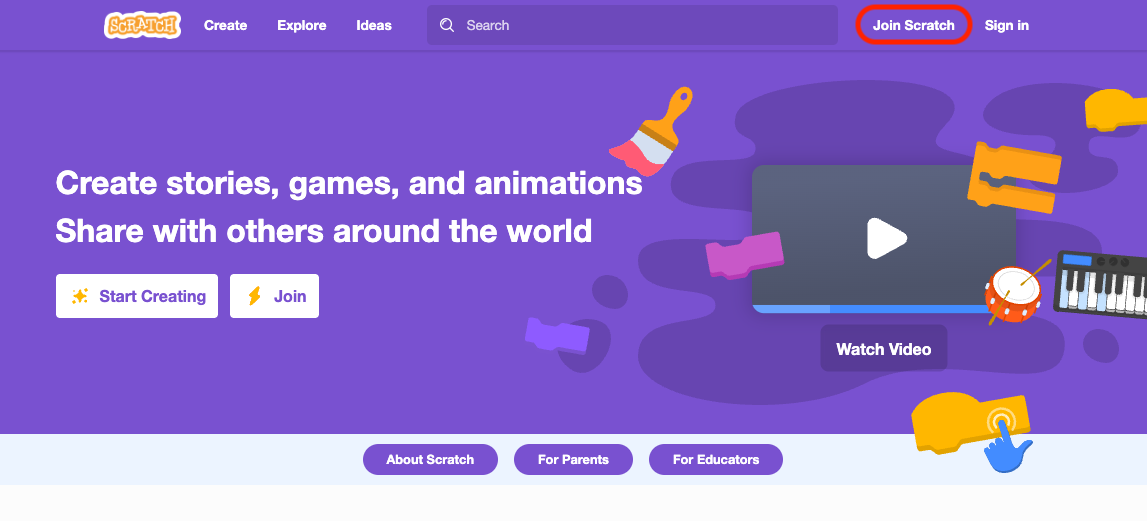
</div>]]></content><author><name>Matthew Hasler</name></author><category term="how-to" /><summary type="html"><![CDATA[How to join the Wi-Fi at Gravesend Library so you can get online during Code Club sessions.]]></summary></entry><entry><title type="html">Join Scratch</title><link href="https://gravesend-code-club.viboko.dev/2026/01/01/join-scratch" rel="alternate" type="text/html" title="Join Scratch" /><published>2026-01-01T00:00:00+00:00</published><updated>2026-01-01T00:00:00+00:00</updated><id>https://gravesend-code-club.viboko.dev/2026/01/01/join-scratch</id><content type="html" xml:base="https://gravesend-code-club.viboko.dev/2026/01/01/join-scratch"><![CDATA[<p>Scratch is the website we use to build our projects, so the first step is creating an account. Go to <a href="https://scratch.mit.edu/">scratch.mit.edu</a> in your browser, then click <strong>Join Scratch</strong> in the top-right corner.</p>

<p><img src="/assets/img/join-scratch/join-scratch.webp" alt="The Scratch homepage, with the Join Scratch button highlighted top-right" class="how-to-image" /></p>

<p>Follow the on-screen instructions to set up your account. Your adult will need to provide their email address as part of sign-up.</p>

<div class="callout callout--important">
  <p><strong>Important:</strong> an adult needs to verify your account by email before you’re able to share your Scratch projects — so make sure this step is done before you get too far into your project!</p>
</div>]]></content><author><name>Matthew Hasler</name></author><category term="scratch" /><category term="how-to" /><summary type="html"><![CDATA[How to create a Scratch account and get set up ready to start coding.]]></summary></entry></feed>